Working with Layers
Exchange allows you to upload layers for better visualization of your data, and to create a more detailed map.
Exchange supports the following Vector formats:
- ESRI Shapefile
- CSV (Comma Separated Value)
- Google Earth KML
- GeoJSON
The following are the supported Raster formats:
GeoTIFF
ERDAS Imagine
JPEG2000
NITF (National Imagery Transmission Format)
CIB (Controlled Image Base)
- 1 Meter
- 5 Meter
- 10 Meter
CADRG (Compressed Arc Digitized Raster Graphic)
- GNC (Global Navigation Chart)
- JNC (Jet Navigation Chart)
- ONC (Operational Navigation Chart)
- TPC (Tactical Pilotage Chart)
- JOG (Joint Operations Graphic)
- TLM100 (Topographic Line Map 100K)
- TLM50 (Topographic Line Map 50K)
All file types listed can be uploaded as a Zip Archive (.zip).
Once the layers are uploaded, they will be available to other users in Exchange.
Upload a layer
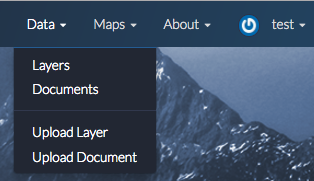
Click the Data link on the Exchange toolbar, and select Upload Layers in the drop-down menu to open the Upload Layers page.
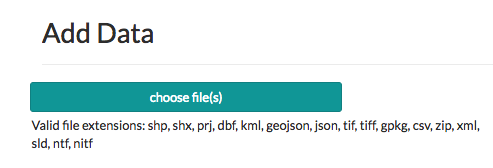
Click the :guilable:`Choose Files` button. This will open a local file dialog. Navigate to your data folder and select the file(s) for the geospatial layer..
Note: Some file types require multiple files to create a complete layer. If you are uploading an ESRI Shapefile, be sure to include the .dbf, .prj, .shp, and .shx files.
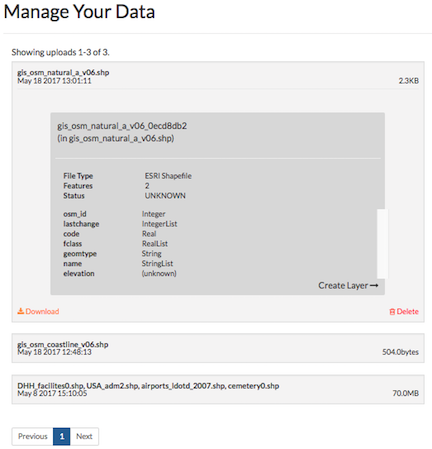
Click on your file under Manage Your Data. Verify the file information is correct, and select Create Layer.
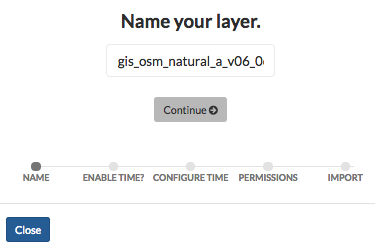
Verify the name of your layer is correct, and click the Continue button. A unique identifier will be added to the end of your layer.
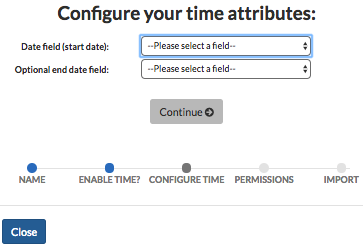
Configure time attributes
A feature can currently support one or two time attributes. If a single attribute is used, the feature is considered relevant at that single point in time (start date). If two attributes are used, the second attribute represents the end of a valid time period for the feature.
A time attribute can be:
- A date - 02/15/2016 11:23 AM
- Text that can be converted to a timestamp - Wednesday December 7, 2016 9:47 AM
- A number representing a year - 2016, 1978
You will select the attribute you want to use from the drop down list. Exchange can handle the following formats:
The most common formatting flags are:
- y - year
- M - month
- d - day of month
- h - hour of the day (0 - 23)
- k - hour of the day (1-24)
- m - minute in an hour
- s - seconds in a minute
Exchange will also handle date and optional time variants of ISO-8601. In terms of the formatting flags noted above, these are:
yyyy-MM-dd’T’HH:mm:ss.SSS’Z’
yyyy-MM-dd’T’HH:mm:sss’Z’
yyyy-MM-dd’T’HH:mm:ss’Z’
yyyy-MM-dd’T’HH:mm’Z’
yyyy-MM-dd’T’HH’Z’
yyyy-MM-dd
yyyy-MM
yyyy
Note: Single quotes represent a literal character.
To remove ambiguity, repeat a code to represent the maximum number of digits. For example, yyyy or MM instead of yy or M.
Select a time attribute option for your layer.
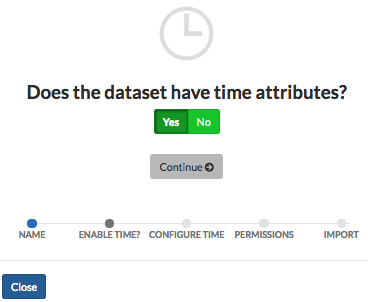
Yes - If your layer has an attribute for time configuration, and you’d like to enable the playback feature, select Yes. Configure the time attribute by selecting which data field is the Start Date. Selecting an end date is optional.
No - Select No if your data does not include temporal information.
Click the Continue button.
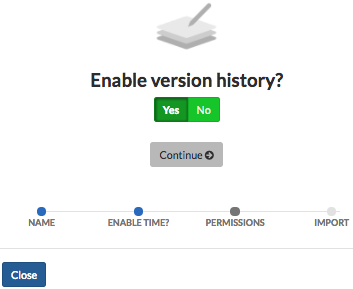
Enable version history
- Select whether or not you’d like to enable version history.
Exchange uses GeoGig repositories to maintain version control of your vector data. By enabling version history, you can see the history of changes and who made them. Please reference the Editing and Version Management section for further information. Establishing permissions for your layers allows you to see edits made to the information through version history. Please see the below section on Setting Permissions for more information.
Note: Attempting to enable version history for a raster file will cause an error, notifying you to verify your configuration before you can proceed with the import.
Select Yes or No, followed by the Continue button.
Click the Create my layer button to begin the import. You will be notified that the importer has successfully finished. Select the hyperlink to view your layer, or click the Close button to continue importing data.
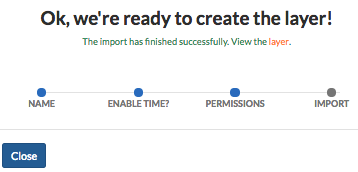
Selecting View the layer will take you to the layer’s information page, where you can create permissions for viewing and editing your data.
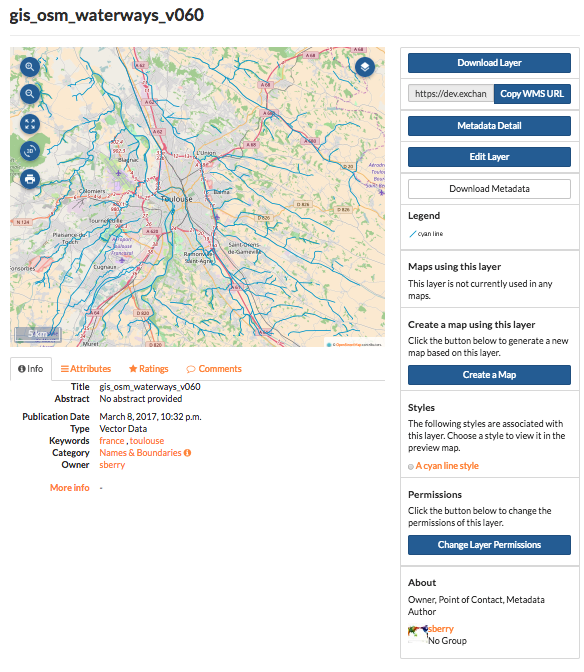
Layer information
Each layer has an information page associated to it, which has several options for managing the layer’s data. Information is available for the following:
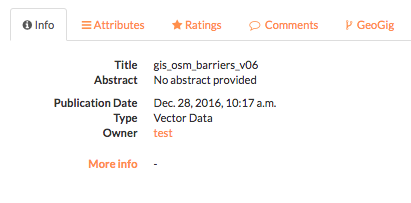
- Info – Displays general information about the layer
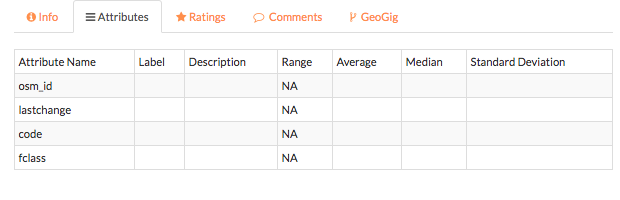
- Attributes - Lists the features in a layer, and the nonspatial information about the feature
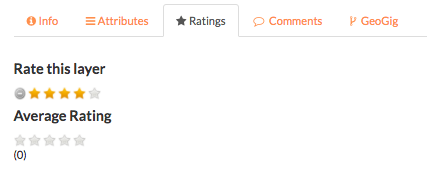
- Ratings – Based on the ratings of other users
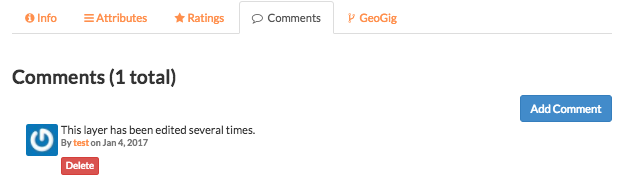
- Comments – Any comments on the layer from users
- Legend – Maps using this layer – What other maps within Exchange are using the layer
- Permissions – How others can see or modify this layer
- Styles – What styles are associated to the layer
- About – Provides information on the owner, Point of Contact and Metadata Author
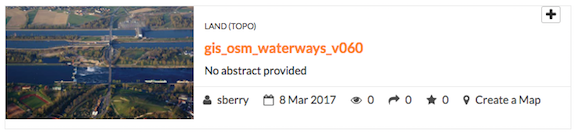
- To access Layer Information, click the Data link on the Exchange toolbar, and select Layers from the drop-down menu. This will open the Explore Layers page. Here you will see a list of all of the available layers. Each layer has a thumbnail image, as well as the title, author, and any associated keywords.
- Click the title of the layer you want to access.
- The information page for the layer will open.
Using the map features
Within the Map Information page, there are some map features that will help you view the layer more in depth.
Zoom - Select the Zoom In or Zoom Out button to zoom to a specific location. Depending on the basemap, you may be able to zoom in as close as 1:10 meters.
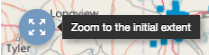
Zoom to the Initial Extent - Return to the original extent of the map.
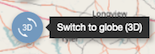
Switch to Globe (3D) - Select this button to view this map as 3D.
Print Map - Select Print Map to print a copy of the layer.

Layers - Select the Layers button to turn any of your layers off or on.
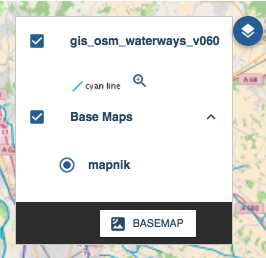
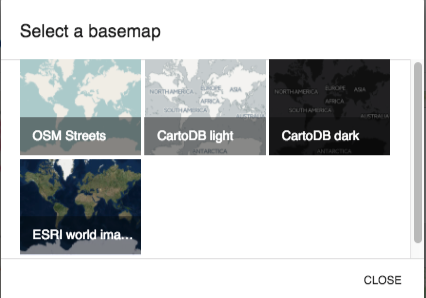
Click the Basemap button to select a different basemap style.
Layer detail tabs
There are five tabs with information pertaining to the particular layer: Info, Attributes, Ratings, Comments, and GeoGig.
The Info tab is the default display, and contains basic information about the layer, such as the title, who created it, and when it was published.
The Attributes tab displays the layer attribute table. Layer attribute statistics will only display if the value is a numeric attribute, otherwise, no statistics will be calculated.
The Ratings tab displays all ratings given to a layer by other users. Click on a star to rate the layer (one to five stars). Click the Cancel this rating icon to delete your rating.
The Comments tab allows you to see what others are saying about this layer, as well as leave your own comment. Click the Add Comment button to leave a comment about the layer. When you’ve finished, click the Submit Comment button.
The GeoGig tab shows you the history of edits that have been made to the layer, when they were made, and by whom.

Editing metadata and managing layers
Each layer’s information page allows you to view the information that makes up the layer. Exchange allows you to edit metadata pertaining to a layer that you have uploaded, as well as any layers you are given permissions to access by other users.
Edit metadata
Metadata is information about the layer, such as the owner, title, purpose or restrictions on a layer. You can include as much information about the layer as you feel is important; the more you can tell other users about your layer, the better. If you have questions about what to put in a field, hover your mouse over the area. An information balloon will explain what is required.
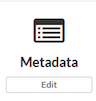
- Click the Edit Layer button, and select the Edit button under Metadata. The Edit Metadata page will display.
- Edit the information fields to include anything pertinent to the layer. Note: Once you begin to edit the metadata, the Category field becomes mandatory, and you must select at least one.
- Click the Update button at either the top or bottom of the page to save your changes.
Create a custom thumbnail
Custom images related to your map can be created, and will display next to the map on the Explore Maps page.
- From the layer’s info page, click the Edit Layer button.

- Click the Set from file button to browse to the image.

- Browse to the image you’d like to use. Once added, the new image will display.
Set permissions
The social design of Exchange allows users to coordinate on projects by sharing access to the same layers and maps; however, there may be instances when you want to limit who has what access to your layers. In Exchange, you can establish permissions for who can view, edit, and manage layers. Permissions can also be set for editing styles and metadata.
By default, when a layer is uploaded, the permissions are set so that only the person who uploaded the layer has access to it. If you want other people to view, download, or edit the layer, you must change the permissions to allow it. Without changing permissions, other registered users will not see it listed as an available layer.
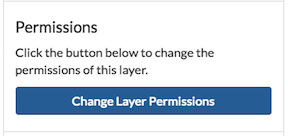
- Click the Change Layer Permissions button.
- Under the Who can view and Who can download sections, add the name(s) of registered users or groups. This will ensure anonymous view access is disabled, and only those users specified are able to see your layers. You can also leave the checkbox checked to allow all users access to the layer.
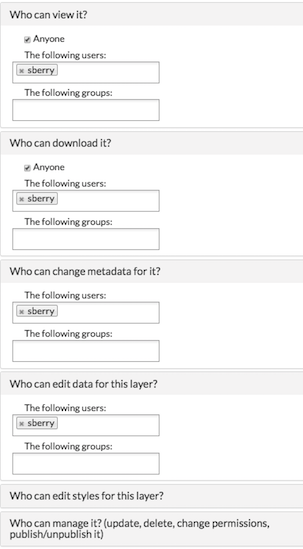
- You can make the same changes for who can edit, change metadata, styles and who can manage the data. Add the names of users or groups who have permission to edit the layer. Click the Apply Changes button when you are finished.
Manage styles
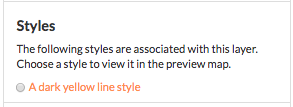
Layers can have multiple associated styles. The Styles section tells you which style(s) is currently associated to the layer.
- Click the Edit Layer button, and then Manage under Styles
- Click the name of a style in the left-hand list to select it, and move it to the right-hand list.
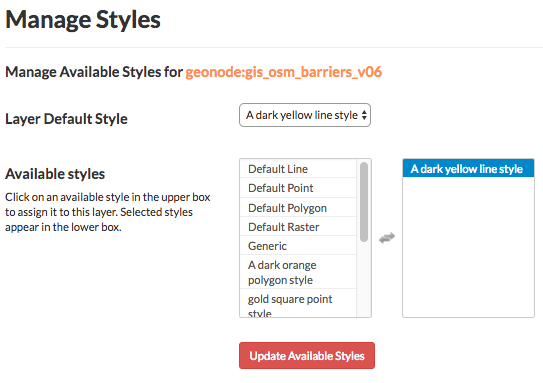
- Click a style in the right-hand list, and click the arrows between the lists to remove a style.
- Click the Update available Styles button to save changes.
Replace a layer
Replacing a layer allows you to upload a new layer, taking the place of the current layer.
- Click the Edit Layer button, and select the Replace button.
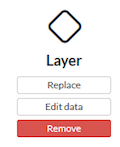
- Follow the instructions to upload a new layer.
Remove a layer
Removing a layer will delete it completely from Boundless Exchange.
- Click the Edit Layer button, and select Remove.
- Verify your selection by clicking the Yes, I am sure button.

Downloading data from a layer
Within Exchange, there are two ways to extract data and metadata, download a layer or download a layer’s metadata. This facilitates the flow of geospatial data in (import) and out (export) of Exchange.
Download data
- Click the Download Layer button.
- Select the format in which you’d like the data to be downloaded. Exchange currently offers the following formats for use in multiple geospatial platforms:
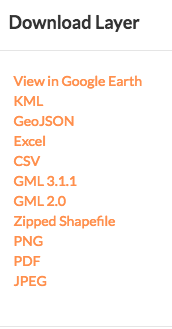
- Save the file to your computer when the Save As dialog box opens.
Download metadata
- Click the Download Metadata button.
- Select the format in which you’d like to download the metadata.
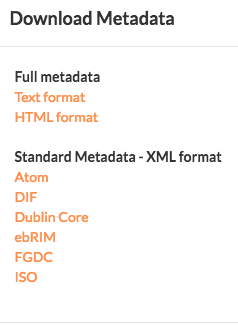
- Save the file to your computer when prompted.